Sunday, November 2, 2014

A bit of a change in the blog

I'm sorry I don't update very frequently.  I've decided to make this more of a personal blog instead of just focusing it on recipes and crafts.  Unfortunately when I focus it solely on cooking or crafts, I end up getting frustrated and not updating.

So, what's been going on in my life.  My husband and I have been dealing with infertility.  This blog will most likely include a great deal of information that some would describe as TMI, but when you've been dealing with this for years, you start to not care.  The only "problem" with our fertility appears to be with me.  I've been diagnosed with PCOS, and more specifically, I simply don't ovulate like I should.  My cycles are highly irregular to the point that they are completely unpredictable, and they do eventually just stop.  Over the last year, I took 7 total cycles of Clomid until, on my third cycle of 200 mg a day, I was able to get pregnant at the end of April 2014.  Unfortunately, I then miscarried and had to have a D&C on June 20.  Since then, we've been seeing an RE (reproductive endocrinologist) for more tests and treatment.  The tests have confirmed that I'm the only "problem" and that the only issue I seem to have is the anovulation.  Unfortunately, since I've already had so many cycles of Clomid, the RE is not comfortable with ever giving me any more.  Now, we had originally planned to stop trying if we had to move to injectable medications, but once we talked to our insurance and realized that they actually covered more of the hormones then we thought they did, we did decide to go further and see if we can succeed with the hormones.  The medications have been ordered and should be arriving on Tuesday, so we'll be able to actually get the ball rolling soon I hope!

On the craft side of life, I'm still crocheting, but nothing new or exciting lately.  I'm starting to teach myself how to knit, but haven't finished a project yet so no pictures are available there. I did recently get to decorate a cake and cupcakes for my Uncle and lovely new Aunt's wedding.


My husband also got me a lovely little kitten for my birthday. Her name is Morgana.


Well, that's it for now. It's off to bed soon, so have a blessed day!


Sunday, January 13, 2013

Check in

A bit of a different post here.  I've finally signed up for a gym.  Our insurance actually offers a plan of their own where you pay a monthly fee to them and get unlimited basic access to any participating gyms.  Even if you travel.  So if anyone's wanting to join a gym, I would check with your insurance first. From what I saw, a lot of insurances are offering either these type of plans or reimbursements if you are going to a gym now.  At least in the US.  So I'm starting my gym memberships on Monday.  I'm 5'1" and 142.2 pounds as of this morning.  My cholesterol as of last month was 265.  So I'll be updating periodically on any weight loss or blood work changes.  Sorry to not have any new recipes up lately.  I should have 2 up in the next few days.  Thanks so much and have a blessed day!

Sunday, January 6, 2013

Lasagna with homemade noodles

So dinner tonight was lasagna.  When I have the time, I like to make our noodles from scratch.  They tend to taste better in general, but you can also add herbs into the noodles themselves to compliment whatever dish you're going to use them in.  So first, the noodles.

The recipe I use is technically a ravioli pasta, but I just use it for any pasta so far.

2 cups flour
2 eggs
1/4 cup of olive oil
1/2 teaspoon of salt
3 Tablespoons of water 

Mix dry ingredients together in a bowl, then add wet ingredients. If you want to add herbs to the dough, they are easiest to add before you put the wet ingredients in, but can be added at any point. I usually use a combination of thyme, oregano, and rosemary. This time, it was just thyme.  Once the dough is mixed, it should be put into a lightly oiled bowl, covered with a towel, and allowed to sit for 20-30 minutes.  This makes it much easier to work with.
 
I forgot to oil the bowl this time. It's not a huge deal, but it is easier to work with the dough if the bowl is very lightly oiled.

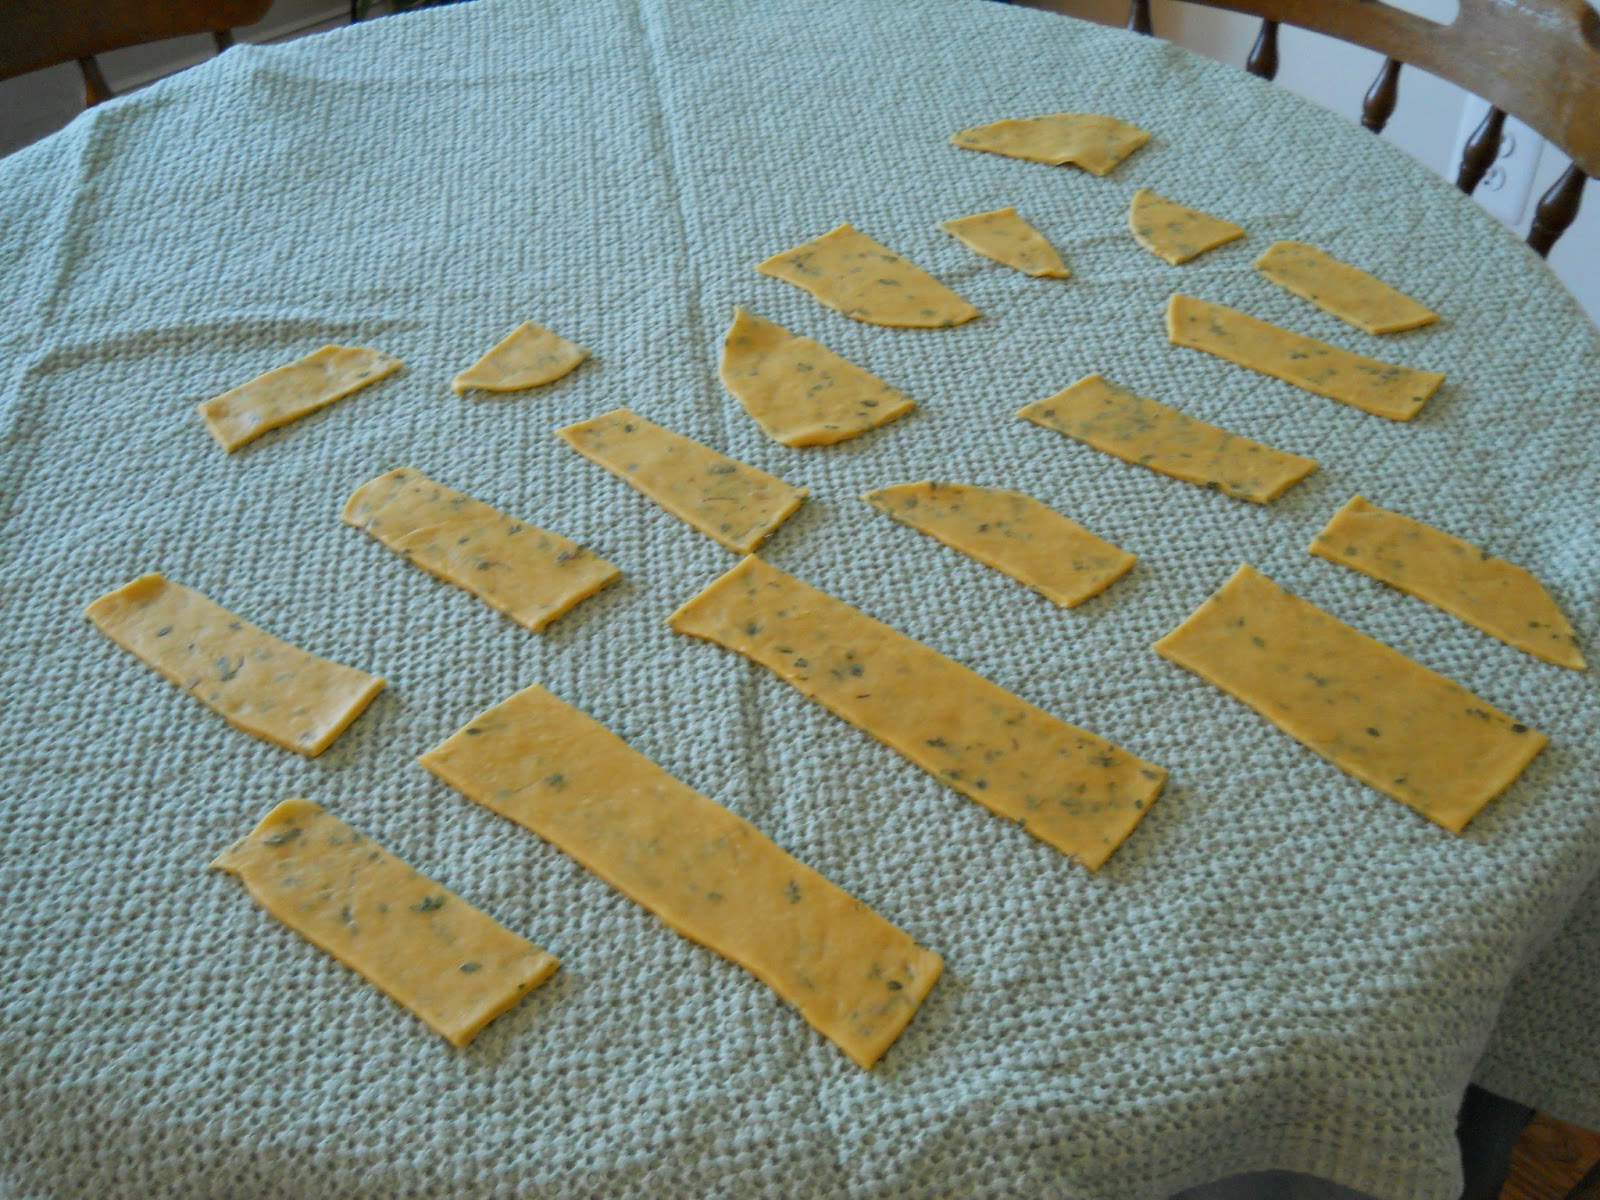
Once the dough has rested for 20 or so minutes, cut the ball in half and roll it out.  You can roll the dough as thin or thick as you prefer, just bear in mind that it will expand slightly with cooking.  Also, the thicker you roll the dough, the fewer noodles you will get out of it.  I usually roll mine much thinner and get enough for 2 lasagnas out of this recipe.  This time, I simply made the noodles thicker.  Then you can use a knife, pizza cutter, or pasta cutter to cut the dough into strips.

 Sorry that the picture is slightly blurry.

If you want, you can always take the time to square the dough off more and make more even strips.  I really wasn't that worried about it.  The rounded noodles work just fine in the pan I use. Then you lay the noodles flat on a table or countertop to dry for approximately 3 hours.  Long enough that they aren't flexible anymore and they don't try to tear when you pick them up.
  

You can then either cook the noodles immediately, or layer them with wax paper into a container and freeze them until you're ready to use them.

I made my noodles on Friday and simply put them into a container in my pantry until today.  The noodles only need boiled about 5 or fewer minutes.  You don't want them completely cooked because they will continue to cook in the oven.

To make the rest of your lasagna, you will also need:

Shredded mozzarella cheese
Shredded parmesan cheese
Spaghetti sauce
1 pound of meat of your choice

I didn't put any amounts in because I don't really measure them.  I just know what I need for my size baking dish.  I do use everything in the picture.

The first step is to cook your noodles and meat.  This time, I used ground pork.  It had a very low fat content, so I just used a little bit of olive oil.  Just be careful to not use too much and make your meat greasy. Start to preheat your oven to 400 degrees Fahrenheit.

 Then you're going to take either a little bit of your sauce or olive oil and lightly coat the bottom of your pan.


 Then put down your first layer of noodles.


Your next layer is your meat (or if you're making it meatless, you can use ricotta cheese). You can even just use ricotta cheese as an additional cheese and put it on before the meat, I just didn't have any today.

 Then some more sauce.

 Then spread some mozzarella cheese.


Then your parmesan.


After that, you just repeat your layers. I usually get 3 or 4 layers out of mine.  Most of the time, your last layer would be just noodles, sauce and cheese, but I just do the normal layers all the way up and put extra cheese on the top. Once you're done it should look like this.


You then cover your dish with aluminum foil, put in on a baking sheet, and bake it for 30 minutes or until the sauce is bubbling.  If the sauce is bubbling, but the cheese isn't melted, then take the foil off and leave it in for a few more minutes.  When you take the lasagna out of the oven, let it sit for a few more minutes before serving.


Please excuse the cut part.  I almost forgot to take the picture!

This usually lasts the two of us 2 meals, though it probably would stretch farther if I could get C to enjoy a salad with it.  I'm trying to find recipes to help work more vegetables into our meals while getting around his aversion to most of them.  So hopefully the veggie content will slowly pick up here.  As for this meal, at least I used a pretty veggie heavy sauce.  Usually I would make my own, but we had company last night, so I didn't have time. This week, we have a couple of new recipes on the menu and the chicken pastina from an earlier post here, so hopefully I'll have a couple more posts this week! Have a blessed week everyone!


Friday, January 4, 2013

No Knead Bread

So my project for the last 24 hours has been no-knead bread.  I used the recipe from here.


It was actually very easy, though since I'm not used to taking as many pictures of my cooking anymore, I don't have pictures of every step.

Here's what the dough looked like after sitting for 18 hours:


This is what it looked like set up for the final 2 hour rising:


In the dutch oven:


And out cooling on the rack:


It was really fun to make and a lot easier then I thought it would be.  The only reason this recipe takes so long is because it has to sit for 12-18 hours at first, then 2 hours again. One thing to point out is that if you don't like a really crusty bread, then you won't like this.  And be more sparing with the flour on your towels during the final rising phase then I was.  Otherwise, you end up having to brush flour off of the final product (as seen in the final picture).  That's all the flour I could get off of mine.  Next time I think I'll use oatmeal for a chewy texture.  It is really soft and tasty inside though.  A perfect match for the beef stew that we had with it tonight.

Have a Blessed day!
Hi everyone!  Or anyone who may still check this anyway.  I've been thinking for the last few weeks that I may re-try my blog again.  Probably with the same types of material as before, though hopefully more posts.

A lot has changed since I originally started this blog.  I no longer nanny for A and P, though I do still get to see them as often as possible and they do come visit when their parents take long trips.  A few months after my last post, I met my wonderful now-Husband, who will be called C.  We've been married for almost 3 years now after a very short engagement.  I'm currently a homemaker, though I'm crocheting and selling some baby blankets and decorating cakes (though haven't had any orders for them).  So I'll post pictures of those as I have them. I'll also be posting pictures of new recipes I try.  We're trying to lose some weight and I'm trying to be more organized, so that means more new recipes to try! Glad to be back and hope to have an update soon!

Thursday, April 2, 2009

Waffles

Sorry I haven't updated in forever. Life decided to snowball and I started back to school. A few Sundays ago I decided to surprise A and P with this.
Not bad for a first attempt ever making waffles (plus no instruction manual for the waffle iron, and all that's on it is 2 mysterious lights and a dial). The only problem, we had no baking powder. We did, however, have baking soda...and stupid me remembers seeing recipes with baking soda before and just substituted the same amount for the baking powder. Worked, the batter was light and fluffy, it did not flop. It did have an aftertaste tho. For P, this was nicely covered by some blueberry syrup and she proceeded to gobble it down with typical abandon (including pieces on the floor). A was not so easily placated. He decided he didn't like it and wanted something else. I gave him some vanilla yogurt and he started dipping the waffle in it, then pronounced it good. It was too. Going to have to try that combo again...with waffles made with baking powder next time.

Monday, March 2, 2009

Italian Baked Chicken and Pastina

This was actually dinner during last week, but the batteries in my camera died, so just getting pictures uploaded now. My Mom made this meal while I was visiting for Christmas and it is so good that it's going to be a regular meal here. The recipe is here


The crescent rolls we had with dinner (from a can,don't tell the kids)...minus a few they ate to "tide them over" while the pasta and chicken were still baking. P declared it "yummy" while A decided it was "good as a bean", which doesn't really make much sense. He doesn't usually eat beans when I make them, but he positively shoveled this down. Now I'm just on the hunt for Lenten recipes since they're Catholic. Especially difficult since Fridays are meatless except for fish....and I'm not a big fish person. Oh well, we'll figure out something. On the agenda for the rest of the day:
Laundry
laying clothes out for munchkins for the rest of the week
clean up the nuclear test site (aka my room)

Off to turn on The Corpse Bride and clean!